AdBlock Detectado
Introduction
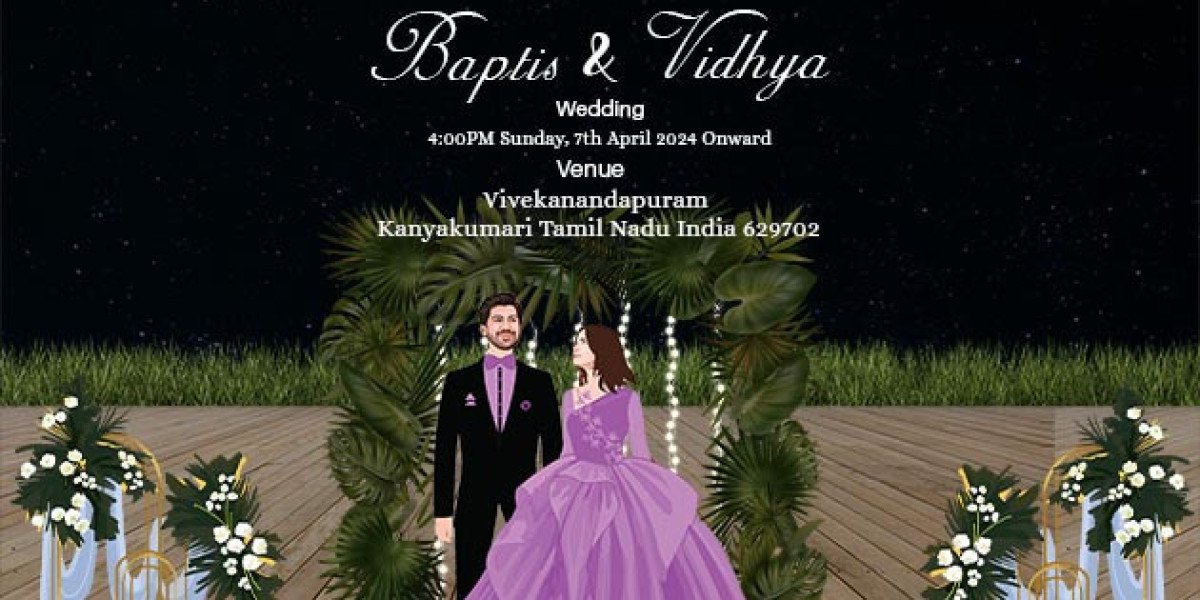
Creating your own invitation cards for upanayanam can be a deeply personal and rewarding experience. Not only does it allow you to add a personal touch to your special events, but it also showcases your creativity and effort. Whether you're planning a wedding, birthday party, or a casual get-together, DIY invitation cards can set the perfect tone for your event.
Materials Needed
Before diving into the creation process, it's crucial to gather all the necessary materials. Here’s what you’ll need:
Essential Tools
- Cardstock or quality paper
- Scissors or a paper cutter
- Ruler and pencil
- Glue or double-sided tape
- Markers, pens, or calligraphy tools
Optional Enhancements
- Decorative ribbons
- Stickers or stamps
- Embossing powder and heat tool
- Watercolors or colored pencils
Choosing a Theme
The theme of your invitation should reflect the nature of your event. Here are some popular options:
Event-Specific Themes
- Weddings: Elegant and timeless
- Birthdays: Fun and vibrant
- Baby Showers: Soft and playful
Seasonal Themes
- Spring: Floral and pastel
- Summer: Bright and sunny
- Winter: Cozy and festive
Color Schemes
Selecting a cohesive color scheme is vital for a polished look. Consider the event's theme and your personal preferences when choosing colors.
Designing Your Invitation Card
Designing your card can be as simple or as intricate as you desire. You can choose to:
Using Online Templates
There are numerous free and paid templates available online that you can customize to your liking. Websites like Canva and Adobe Spark are great starting points.
Handcrafted Designs
For a more personal touch, consider handcrafting your design. This allows for unlimited creativity and uniqueness.
Step-by-Step Guide to Creating DIY Invitation Cards
Step 1: Gather Your Materials
Before starting, ensure you have all your materials ready. This includes your cardstock, tools, and any decorative elements you plan to use.
Step 2: Choose Your Design
Decide whether you want to use a template or create a freehand design. Templates are great for beginners, while freehand designs offer more creative freedom.
Step 3: Cut and Fold Your Cardstock
Measure and cut your cardstock to the desired size. Standard Invite card design sizes are 5x7 inches, but you can adjust this based on your preference. Use a ruler for precise measurements and a paper cutter for clean edges. Fold the cardstock carefully to avoid creases.
Step 4: Add Your Design Elements
This step involves bringing your design to life. You can either print your design directly onto the cardstock or draw it by hand. If adding embellishments, ensure they are securely attached.
Step 5: Write Your Text
The text is the heart of your invitation. Choose a font that matches your theme if you’re printing. For handwritten text, use calligraphy tools for an elegant touch. Make sure to include all essential details like the event's date, time, location, and RSVP information.
Step 6: Assemble the Invitation
If your design includes multiple layers or elements, assemble them carefully. Use glue or double-sided tape to attach everything securely. Double-check for any loose parts.
Personalizing Your Invitations
Personal touches can make your invitations stand out. Consider adding:
Adding Photos
Including a photo can make your invitation more memorable. This is especially popular for wedding and anniversary invitations.
Unique Messages
Write a heartfelt message or quote that resonates with the event. This adds a personal touch and makes your invitation more meaningful.
Printing Options
Home Printing Tips
If you’re printing at home, ensure your printer settings are optimized for high-quality printing. Use the best paper setting and select the appropriate paper type.
Professional Printing Services
For a more polished finish, consider using professional printing services. They offer a variety of paper options and finishes that can elevate the look of your invitations.
Envelope Design
The envelope is the first thing your guests will see, so make it count.
Matching Envelopes
Use envelopes that match your invitation's theme and color scheme. You can buy pre-made ones or create your own.
Addressing Tips
Handwrite addresses for a personal touch, or use printable address labels for a cleaner look. Ensure all addresses are correct to avoid any delivery issues.
Sustainability Tips
Eco-Friendly Materials
Choose recycled paper or eco-friendly materials to minimize your environmental impact.
Recycling Ideas
Encourage guests to recycle your invitations or reuse them in creative ways, such as bookmarks or keepsakes.
Common Mistakes to Avoid
Overcrowded Designs
Keep your design clean and uncluttered. Too many elements can make your invitation look messy.
Typos and Errors
Double-check all text for spelling and grammatical errors. It’s a good idea to have someone else proofread your invitation.
Inspiration and Ideas
Need some creative inspiration? Here are a few unique ideas:
Creative Invitations
- Pop-up cards
- Interactive designs like puzzles or scratch-off elements
Unique Themes
- Vintage postcards
- Modern minimalist designs
- Rustic charm with twine and kraft paper
Sharing Your DIY Creations
Show off your hard work by sharing your creations online.
Social Media Platforms
Post pictures on platforms like Instagram, Pinterest, and Facebook to inspire others.
DIY Communities
Join online communities and forums to share ideas, get feedback, and learn from others.
Conclusion
Creating DIY invitation cards is a fulfilling project that adds a personal touch to your events. By following this step-by-step guide, you can design beautiful and unique invitations that your guests will love. Remember to gather all your materials, choose a theme, and carefully assemble your designs. Happy crafting!